In the era of self-hosting, ensuring secure and reliable access to your server is critical. Cloudflare Zero Trust offers a seamless solution. This blog post will walk you through setting up a Cloudflare Tunnel, making your services accessible and protected.
Prerequisites:
- Docker installed on your server
- A Cloudflare account
- A domain name registered/managed by Cloudflare
Cloudflare Tunnels provide a secure way to expose your local web servers to the Internet without having to open ports or modify firewall settings. By establishing only an outbound connection from your server to Cloudflare, these tunnels ensure that all traffic is encrypted and routed through Cloudflare’s global network, improving both security and performance. This setup not only simplifies deployment but also protects your server from direct attacks by hiding its real IP address.
Note: some of the steps below need to be adjusted to match your setup!
Create a Cloudflare Tunnel
Now we need to create a tunnel configuration with Cloudflare.
Cloudflare Tunnel Token
We need to obtain a token for the tunnel in order to connect to Cloudflare.
To do this:
- Go to https://dash.cloudflare.com
- Navigate to Zero Trust
- Click Networks -> Tunnels
- Click Add a Tunnel
- Select Cloudflared and click Next
- Give your tunnel a name
- Click Save Tunnel
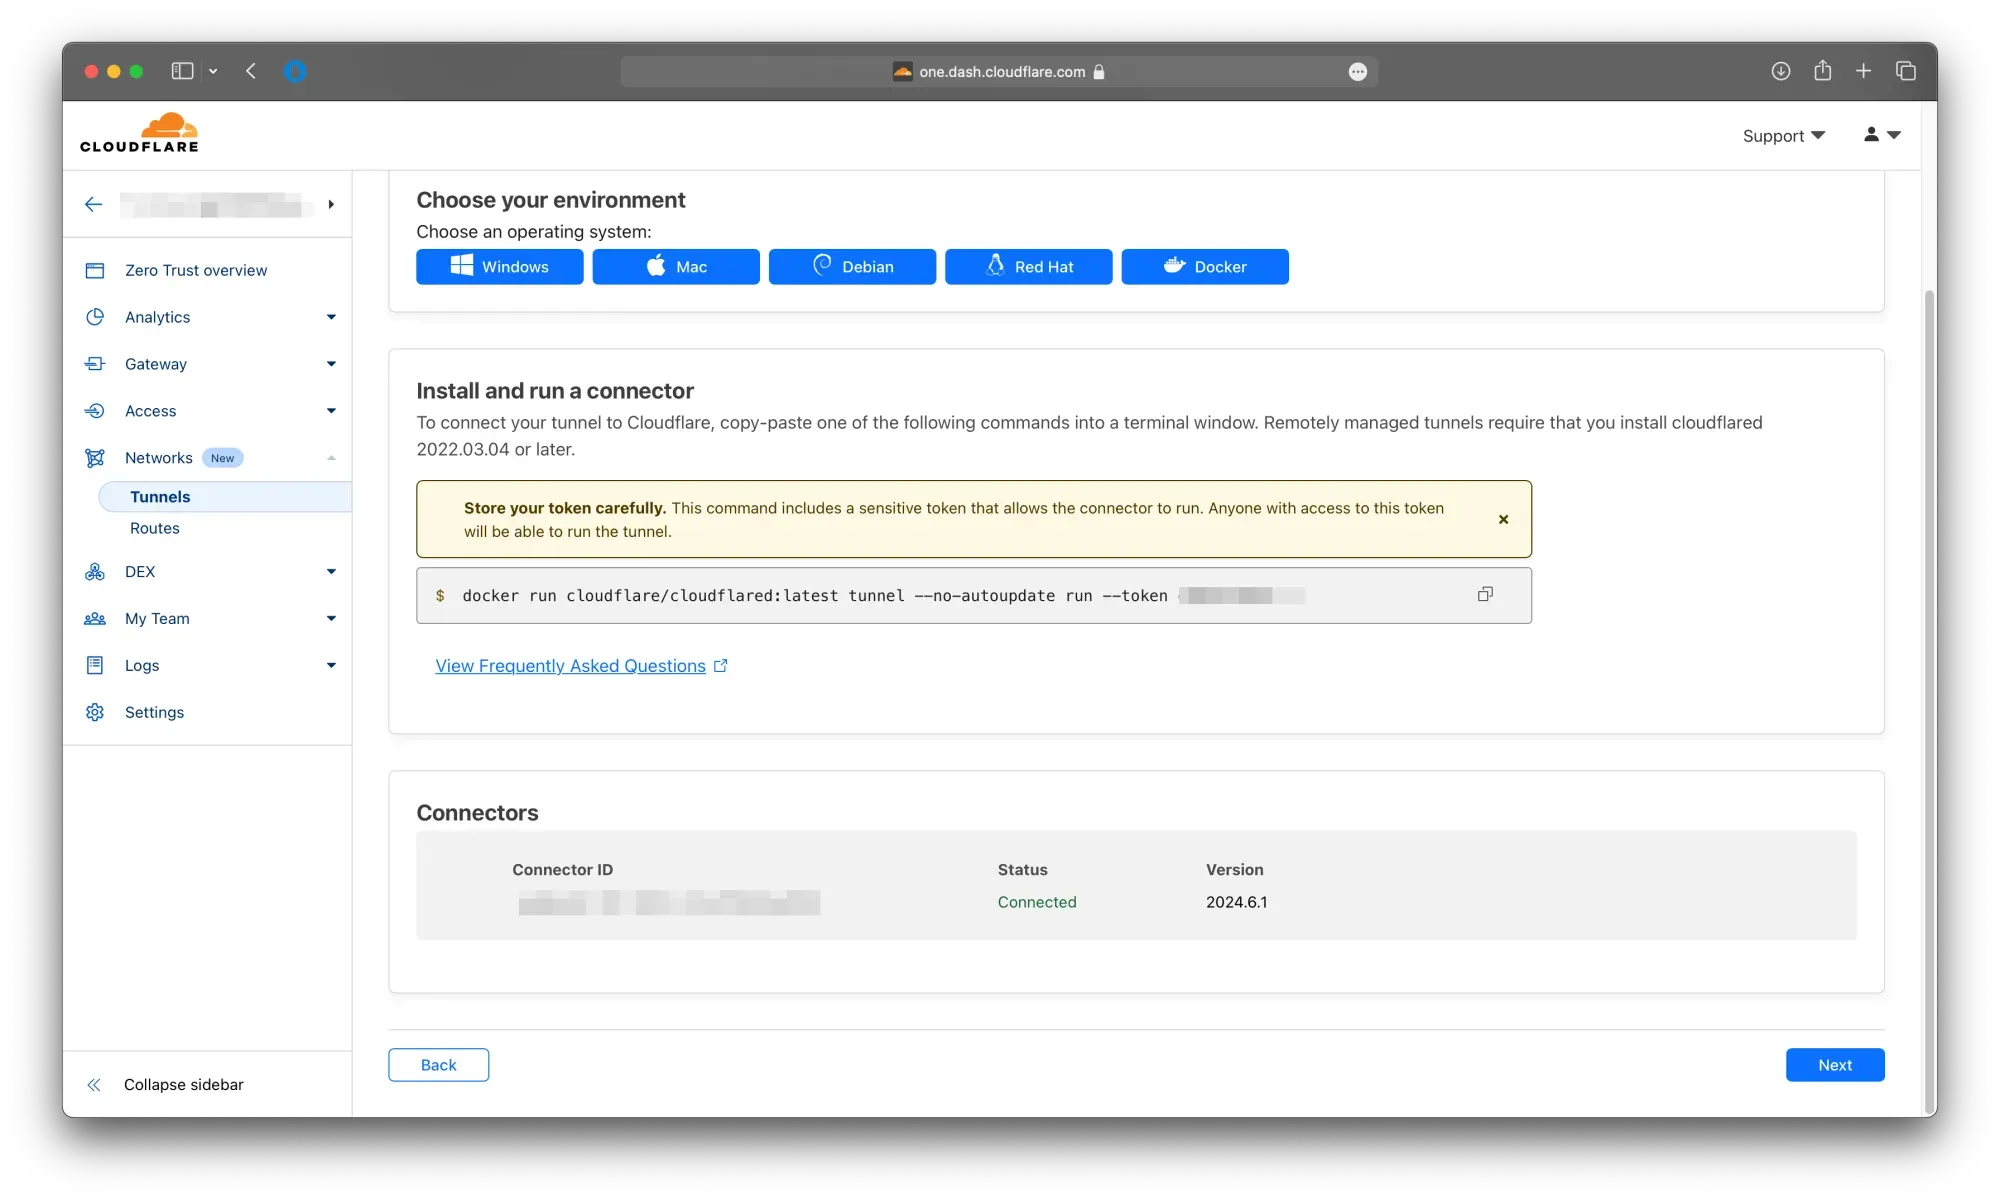
- Choose Docker as the installation method
- Copy the command using the copy button
- Paste it into a notepad of your choice
Docker compose
We need to create a folder to hold the docker-compose.yml.
mkdir cloudflared
cd cloudflared
Inside the folder, we’ll create a docker-compose.yml to spin up the Docker container.
nano docker-compose.ymlservices:
cloudflared:
image: cloudflare/cloudflared
container_name: cloudflared
environment:
- TZ=Europe/Moscow
- TUNNEL_TOKEN=${TOKEN}
restart: unless-stopped
command: tunnel --no-autoupdate run
networks:
- cloudflared
networks:
cloudflared:
name: cloudflaredSince we don’t want the token to live in the docker-compose file, we’ll create a .env file in the same directory as your docker-compose.yml.
nano .envPlace the following content into this .env file.
TOKEN=<Your token>Replace
Now let’s start Cloudflared by running:
docker compose up -dIf everything is correct, you’ll see the tunnel connect within a few seconds.
Cloudflare tunnel connected
Add a service to test
To confirm that everything works, let’s run a simple service to test the tunnel. We’ll use the whoami application. It’s just an HTTP service that displays some browser and OS information.
To do this, we’ll create another directory named whoami with its own docker-compose.yml.
cd ..
mkdir whoami
nano whoami/docker-compose.yml
services:
whoami:
container_name: simple-service
image: traefik/whoami
networks:
- cloudflared
networks:
cloudflared:
name: cloudflaredTo start the container, run the command below.
docker compose -f whoami/docker-compose.yml up -dNow that this is running, we can continue configuring the tunnel. Let’s go back to the Cloudflare page and click “Next.”
Fill in the following fields:
- Subdomain — the subdomain to use, e.g., test
- Domain — choose the domain name to use from the list
- Type — select HTTP
- URL — enter the IP and port of the application you want to connect to
If the application is on the same Docker network as the Cloudflare tunnel, you can use the container name simple-service.
As a final step, click Save Tunnel. The tunnel will now receive its configuration, and you’ll be able to access your service through Cloudflare.
If you now run nslookup and trace the route for the specified domain name, you’ll see that all traffic goes to Cloudflare. Your own IP address is shown nowhere.
If you want to add more services through the same tunnel, go to the Networks -> Tunnels page.
- Click on the tunnel to which you want to add a public hostname.
- Click Edit
- Go to Public Hostname
- Click Add a public hostname
- Fill in the Subdomain, Domain, Type, and URL fields, as described above.
One-Time Password
To ensure that not everyone can access your services, you can use one-time PIN-based authentication for users accessing your network through the tunnels.
On the Zero Trust page:
- Go to Access -> Applications.
- Edit the application you want to modify.
Go to Authentication. - Make sure you have the one-time PIN selected.
Click Save Application.
You can also define various access policies under the Access Policies section.